Thursday, November 21, 2013

Sweet Potatoes or Yams?


My brother and I once ruined the family Thanksgiving with arguing about whether sweet potatoes and yams were the same or different types of potatoes. Turns out we were both wrong. They are members of different families, and neither is actually a potato. Neither of them would have been eaten by the Pilgrims at the first Thanksgiving, because neither had yet been introduced into New England. In any case my mother smothered whichever one she used with brown sugar, marshmallows and maple syrup, so that it mattered little what lay under all that.

Candied Sweet Potatoes was a Good Housekeeping favorite recipe for Thanksgiving. Since then I have come to love the real taste of sweet potatoes (or yams) and prefer to cook and eat them in simpler style.

To write this article, I began an Internet investigation to determine the differences between sweet potatoes and yams, but instead of clarifying the issue, my research caused greater confusion. All authorities seem to agree that they are two different plants with different botanical and geographic origins. The confusion is traced back to when sweet potatoes became an important crop in the American South. The African slaves referred to them as "nyami" (a crop they were familiar with in Africa). They became "yams," which led to the US Department of Agriculture requiring that yams also be identified as "sweet potatoes." No wonder we are all confused.

Some culinary experts, however, say that sweet potatoes are moist and sweet, while yams are dry and starchy. Others insist that yams are the sweeter of the two. There are hundreds of varieties of sweet potatoes, some of which, I am led to believe, are sweeter and more moist than yams, but others, maybe not. The single most important difference for cooks and consumers is that yams (rough, scaly brown skin and fairly light-colored flesh) are low in beta-carotene, while sweet potatoes—which usually have a smooth, darker skin and could have any shade of flesh from pale yellow to deep orange or even purple—are high in beta-carotene. The darker the “meat,” the more beta-carotene, and therefore the more antioxidants and health benefits. 

In all of the following tips, suggestions and recipes, sweet potatoes and yams are interchangeable.

Selecting and storing sweet potatoes
Choose sweet potatoes with unblemished skins. Never refrigerate raw sweet potatoes, as it tends to harden the flesh and develop an unpleasant flavor.  Sweet potatoes are best stored at a cool room temperature (55° F–65° F). Cooked sweet potatoes, whether whole, mashed or candied, can be refrigerated for about a week or frozen for two- to three months.
Cooking sweet potatoes
Scrub the potatoes and boil or steam them with the skins on, which helps retain nutrients, for about 20 minutes for medium-size potatoes. Once cooked, the skins practically slide off, although they can be eaten as well.
Baked Sweet Potatoes
Baking them whole is one of my favorite ways of eating sweet potatoes. Plain, without the addition of any other ingredients, they are not particularly fattening, weighing in at an average 141 calories per spud. Look for sweet potatoes of the same size so that they require the same length of time in the oven. Bake 35- to 45 minutes (depending on size), until potatoes feel soft to slight finger pressure or a fork can be inserted easily.


Mashed Sweet Potatoes
Rinse but do not peel and then boil or steam medium-size potatoes about 20 minutes, until very tender. Remove the skins and mash or puree. For every pound of potatoes, add two tablespoons of unsalted butter, 1/8 teaspoon of ground nutmeg, salt and pepper to taste, and two to four tablespoons of milk or cream.

Sweet Potato Fries
Preheat oven to 425° F. Rinse and pat dry the sweet potatoes. Peel, cut in half and then cut into ¾-inch slices so they look like fries. Spread them out on the baking sheet so they are evenly spaced and not touching (this is important, or they will become soggy, not crispy), season with sea salt and freshly ground pepper and drizzle with olive oil. Mix them so that each fry is slightly coated with the oil and salt and pepper. Bake for 15 minutes, and then turn each of them over and bake another 10–15 minutes, until they are fairly dark and crispy.
Sweet Potato Casserole
Preheat oven to 350° F. For eight people, mix 4 cups of mashed sweet potatoes, 1 cup of brown sugar, 2 lightly beaten eggs, a half cup of milk, a half cup of melted butter and a teaspoon of vanilla, and place mixture into a greased 2-quart casserole dish.  Make a topping by combining a half cup of brown sugar, one-third cup of flour, one third cup of melted butter and a cup of chopped pecans. Sprinkle the topping over the sweet potato mixture and bake for 35- to 40 minutes, until hot and browned.


Time to Talk Turkey


With prices ranging from 40 cents to 9 dollars per pound, it is very difficult to decide what kind of bird it makes sense to buy. Today's legal and marketing terminology makes the choice  confusing.  I have put together a glossary along with some facts that are important to best determine which turkey to buy so that you and your guests can enjoy the culinary experience Thanksgiving can and should be. 

Age of the turkey

T
he flavor and tenderness of turkey meat is primarily determined by the age of the turkey at the time it is brought to market. A fryer/roaster is a small turkey of 4- to 8 pounds, usually no older than 4 months. A "Young" turkey is 4- to 8 months old has soft, smooth skin and tender meat. It is the optimum age for turkey roasting.  The meat and skin of a "yearling" (about 12 months old) are still reasonably tender but not quite as tender as in a young turkey. A "mature" or "old" turkey (15-plus months) is not suited for roasting because the meat is too tough.
Turkey gender
Hens are generally smaller than “tom” turkeys of the same age. Hens weigh less than 16 pounds, while toms always weigh more than 16 pounds. Tom turkeys have larger bones and fewer edible portions, which may be reason hens are preferred. Age, not gender, however, is the determining factor for tenderness, and all commercial turkeys are young and tender.
Turkey size
You should plan on about 1.5 lbs per person. This will ensure that you have enough on the day plus some leftovers.
Smoked turkeys
The smoking process cures and cooks the meat with indirect heat, so the turkeys are ready-to-eat. They are available in many different flavors depending on the type of fuel used for the smoking process.

Basted, self-basting or enhanced turkeys
To increase flavor, juiciness and weight, these processed turkeys are injected or vacuum-treated with salt, broth, spices, seasoning, various fats, flavor enhancers and other "approved substances."

"Fresh" or "frozen" turkeys?
If buying your turkey in a supermarket, it is hard to know just how fresh it really is. Labels can be deceiving. Turkeys are labeled "frozen" if they were chilled below 0° F. These flash-frozen turkeys are an economical choice and are frozen immediately after being butchered, so that they maintain their freshness. If marked "previously frozen," the turkey has been defrosted and cannot safely be refrozen. “Fresh” only means that the turkey has never been chilled below 26° F; it may have been butchered weeks or up to two months before being sold to you. Turkeys that have been chilled below 26° F, but not below 0° F, may not be labeled as "fresh" or "frozen," so they are often marked something creative, such as "hard-chilled" or "deep-chilled." 
Thawing a frozen turkey
The safest method is in the refrigerator. It can take up to 5 days for a 20-pound turkey to fully defrost.


Free-range turkeys
These birds are allowed to roam outdoors, which many people believe has a positive effect on the flavor of the meat, especially if the roaming area was not too crowded. The amount of space that a turkey is given to roam, regardless of whether it is indoors or out, actually affects the quality to a greater degree than if the bird is simply allowed to be outdoors.

Organic turkeys
They may be marked "organic" if they are allowed to roam outdoors (free-range), eat only organic feed and never receive any antibiotics or growth hormones. 

“Natural” turkeys
These free-range birds have very limited processing and no artificial ingredients or coloring.

Pastured turkeys
Raised outdoors, these turkeys have spent time hunting-and-pecking for insects and grass. Their varied diet and active life makes their meat more flavorful. 

Kosher
Free-range birds are fed only on grain and never given antibiotics. They are individually inspected and raised and processed with strict guidelines, under rabbinical supervision. When they are processed, the turkeys are soaked in a salty brine solution to provide maximum tenderness and to give the meat a unique flavor.

Broad-Breasted Whites
These “modern" turkeys have been bred to maximize the conversion of feed to white breast meat in the shortest possible time. This is the perfect turkey for those who prefer the white meat to the more flavorful dark meat.

“Heritage” turkeys
Turkey breeds raised on small farms before turkeys were mass marketed are known today, collectively, as "Heritage Turkeys." These free-range birds generally have longer bodies and smaller breast muscles and are bit leaner than most Broad-Breasted Whites. They require an additional 2- to 3 months to grow to the proper size, making them more expensive than commercially raised birds. Their excellent flavor, texture and tenderness make them well worth the money. 

Bourbon Reds
These turkeys are named for their striking red plumage and for Bourbon County, Kentucky, where they were first bred in the 1800s. They're known for a delicious, full flavor and are considered one of the best-tasting heritage turkey breeds.

Narragansett
New England's traditional turkey. Flavorful meat.

Midget White
A smaller variety than most, these are a cross between Royal Palm turkeys and Broad-Breasted Whites. They are known for their deep, delicious flavor.

White Holland
Originally bred in Holland, this turkey has average flavor and tenderness.

Standard Bronze
Over American history Bronzes have been the most popular turkey variety. Originally they were a cross between the domesticated turkeys brought to the colonies by Europeans and the native wild turkeys of America.

Royal Palm
These turkeys were bred more for their good looks (striking black and white plumage) than for their  flavor. 

Black Turkeys
Black Spanish, or Norfolk Black, turkeys, were domesticated from Mexican wild turkeys brought back to Europe by the first Spanish explorers who visited the New World.

To brine or not to brine?
The greatest controversy amongst foodies these days is whether or not to brine turkey before roasting.
Many cooks swear by brining because it makes for a moister, more tender meat. On the other hand, brining makes it harder to get a crisp skin, leaves the cooking juices too salty to use for sauce or gravy, and gives the breast meat the texture of deli turkey (which I hate) rather than roasted turkey breast (which I love). So I personally prefer not to brine.
Roasting
The most important roasting tip for turkey is to remember that the breast cooks much faster than the dark meat, and the bigger the bird, the greater the difference. There are many methods to avoid drying out the white meat while waiting for the dark meat to cook thoroughly. Some people like to cook the bird in aluminum foil or a special plastic roasting bag, but this stews the meat rather than roasts it. The secret I learned from Cordon Bleu many years ago is to soak a cheese cloth in melted butter and cover the breast with it, changing the cloth whenever it gets too brown and leaving it off for the last hour of cooking. 
Stuffing
Do not stuff your turkey ahead of time, as harmful bacteria growth could spoil the uncooked turkey. Just before roasting, stuff the body and the neck of the turkey. Do not pack the stuffing/dressing in the turkey, because the stuffing will expand during cooking. If packed in too tightly, it will be very dense instead of light. Using kitchen twine or skewers, tie or truss the abdomen closed and the legs together close to the body so that the stuffing cooks evenly. Alternatively stuffing can be baked in a separate pan.
Roasting pans
Use a shallow roasting pan. In a deep roasting pan, the meat will steam, not roast. If your turkey is 12 pounds or more, beware of the aluminum foil disposable roasting pans; they are not sturdy enough to hold a large bird and can buckle up and cave in when you are trying to remove the hot turkey from the oven.
Roasting times
A turkey is ready to be removed from the oven when it reaches 165° F at the thigh. How long this takes depends on the temperature of the oven, the size of the bird, whether it was frozen or fresh,  and whether it is stuffed or not. Plan on 20 minutes per pound in a 350° F oven for an unstuffed, defrosted turkey, or 15 minutes per pound for fresh. Add 5 minutes per pound if stuffed.


Basting
The purpose of basting is to produce a golden brown, crispy skin. It does not really produce moisture or otherwise improve the flavor of the interior turkey (that is accomplished with the cheesecloth dipped in melted butter—see "Roasting," above). You lose oven heat by opening the door too often, so keep the basting to a minimum, especially during the last hour of cooking.
“Resting” the bird
Allow the turkey to rest under an aluminum-foil tent (loosely placed to cover the turkey) from 20- to 30 minutes before carving so that the juices can redistribute throughout the bird. 


Leek Tart


In French this is called a Flamiche. It is a flan-like tart made with leeks cooked in milk to which lardons (pieces of trimmed slab bacon) have been added. As an impressive appetizer or a main course with a salad, this delicious Alsatian dish is always a hit—even with people who think they do not like leeks.


Ingredients

1 pie tart shell (Pillsbury, it can be used for savory tarts)
4 tablespoons butter, at room temperature
1 pound leeks
½ pound slab bacon
1 cups boiled milk (I use skim)
2 tablespoons flour
Salt
Freshly ground pepper
Nutmeg


Directions

Use 1 tablespoon of the butter to coat the pie shell. Roll out the dough and line a 9-inch pie plate with it. Poke with a fork five or six times and freeze until you are ready to fill it. (Freezing the pie shell helps it hold its shape and resist absorbing the liquid from the filling; poking the holes avoids air bubbles.)

Trim off and discard the green part of the leeks so that there is only the white. Cut the white into fine rounds. Wash in cold water, separating the rounds to ensure that all of the dirt between the layers is removed. Line a mixing bowl with paper towels, place the washed leeks in the bowl and pat dry with more paper towels. Trim and discard the fatty section of the bacon slab and trim the hard exterior of the meat side. Slice across the remains of the slab into small, thin bits (which are called "lardons").  

Boil the milk and set aside. Preheat oven to 400° F. Melt 2 tablespoons of butter in a medium-large frying pan. Gently heat the lardons in the butter until they begin to color. Add the rest of the butter and the leeks on a very low flame and allow to cook slowly (not coloring) for about 15 minutes, stirring from time to time. Add half of the flour and stir. Add the rest of the flour and stir again. Allow to gently cook. Gradually add the milk (cold or warm), seasoning a couple of times with salt, pepper and nutmeg. Simmer on low heat for about 25 minutes. Remove pie shell from freezer, pour leek mixture into the shell and immediately place in the hot oven for about 20 minutes or until it turns golden brown. Remove from the oven and remove excess liquid with a paper towel. Serve piping hot in the pie plate or slide it onto a round plate.

Butternut Squash & Lentil Soup


2 tablespoons butter
3 leeks (whites only), washed and chopped
1 pound dry lentils
1 large russet potato, peeled and cut into chunks
1 carrot, peeled and chopped
1 pound butternut squash, cut into chunks


In a soup pot, melt the butter and sauté the leeks until translucent but not brown. Add the lentils and mix with the leeks. Add potato, carrot and squash. Cover with water and bring to a boil. Add more liquid if necessary. When all ingredients are soft, puree with a mixer. Serve with a dab of crème fraȋche or heavy cream in each plate. 

The Boyer Croque Monsieur


        Variation: For the Croque-Madame, just fry up an egg, place it on top and sprinkle with parsley.
There are literally dozens of ways of making this French working-class classic—some require special utensils. The Boyer family's open-faced sandwich uses half the bread, is easy to prepare in the average kitchen and is a family favorite. (Serves four. This recipe calls for two slices of bread each, but some of the family do ask for a third.) 

Ingredients
2 tablespoons unsalted butter
2 tablespoons all-purpose flour
1 cup milk (I use skim)
1 teaspoon sea salt
½ teaspoon freshly ground black pepper
Pinch nutmeg
8 slices white sandwich bread, crusts removed
8 ounces baked Virginia ham, sliced (but not paper-thin)                                                                           
8 slices Gruyère (Swiss Cheese)                                                                                                                
2 large tomatoes, sliced
3 tablespoons chopped parsley (optional)

Directions
Preheat the oven to 400° F.
Melt the butter over low heat in a small saucepan and add the flour, whisking until it becomes unified into a paste. Slowly add the milk, ¼ cup at a time, whisking so that the milk is absorbed by the mixture and makes a thick white sauce (Béchamel). Add the salt, pepper and nutmeg, and set aside. Toast the bread, placing the slices on a baking sheet, and bake until a light golden color (two- to three minutes). Turn each slice and bake for another one- to two minutes, until lightly toasted. Lightly brush the toasted breads with the Béchamel sauce. Add a slice of ham to each, top with a slice of Gruyère and finally with a slice of tomato, and bake the open-faced sandwiches for 3-4 minutes. Turn on the broiler and broil for one- to three minutes, or until the cheese topping is bubbly and lightly browned and the tomato is cooked. Serve hot with a knife and fork.

My Lasagna


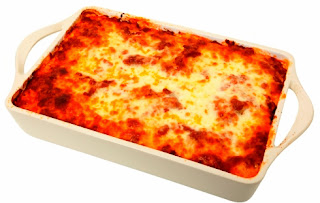
I have been making lasagna for many years, following many different recipes requiring varying degrees of work and difficulty. This is the recipe that I find offers the most taste and satisfaction for the least amount of work. It uses many shortcuts that do not sacrifice flavor. It takes about 45 minutes to prepare plus 45 minutes in the oven. My family—including Gerard—is always happy when I make it. This lasagna is probably his favorite non-French dish. 


Ingredients
(Serves six–eight)

2 cans (14.5-oz ) Del Monte Stewed Tomatoes (Original)
2 cans (14.5-oz ) Del Monte Stewed Tomatoes (Italian Style or with Basil, Onions and  Garlic)
3 leaves fresh basil
2 tablespoons olive oil
1 onion, chopped
2 cloves garlic, pressed or minced
2 pounds chopped beef (least fat)
1 pound thawed frozen sausage meat (Jones) or fresh sausage meat
Salt and pepper
2 tablespoons butter
2 tablespoons flour
1 pint milk (1-percent or skimmed is fine)
Dash grated nutmeg (optional)
2 packages Barilla's NO BOIL Lasagna pasta
1 pound ricotta cheese
1 sliced fresh mozzarella or bag of shredded mozzarella (Sargento)
1 cup grated Parmesan (optional)


Directions

Preheat oven to 350° F.

Make the tomato sauce:
Empty all four cans of tomatoes into a food processor (or into a pot if you use an immersion blender) and mash until they become a thick liquid. Warm up with the fresh basil in it, remove from the heat and allow the basil flavors infuse the tomatoes. Remove the basil before using.

Sauté the meat:
Sauté the chopped onion in the heated olive oil. When soft and translucent but not yet browned, add the minced garlic. Break up the chopped meat and sausage meat into bits and add to the pan, turning so that all of the meat browns evenly and mixes with the onions. Add salt and pepper. Drain and add a half cup of the tomato sauce. Mix.

Make the béchamel sauce:
In a saucepan, over low heat, melt 2 tablespoons of butter and whisk in the 2 tablespoons of flour. While constantly whisking, slowly add (¼ cup at a time) two cups of milk (I use skim). It will thicken. Remove from heat. Add salt, pepper and a touch of nutmeg. Cover the bottom of an oven-proof lasagna pan (roughly 9 inches x 14 inches, or 8 inches x 12 inches) with this white sauce.

Prepare the pasta:
The no-boil pasta makes this dish so much easier to make than when we had to boil the pasta first and deal with the wet noodles. The only inconvenience is learning to gently break the uncooked pasta to fit your dish without crumbling the pieces. Now that I have mastered the technique, I actually only use one box of pasta—but I suggest you purchase two so that you have some spares. Place a layer of uncooked pasta in the béchamel sauce to cover the bottom of the pan. The pieces will probably not fit exactly, so you will have to gently break a few of them in half lengthwise to fill in the gaps. (This does not have to be exact. There can be a very little space between them or at the sides.)

Layer the lasagna:
Ladle a thin layer of tomato sauce over the dry pasta and cover with half of the meat. Use a spatula to spread evenly and cover the entire layer. Place another layer of dry pasta and cover with the ricotta cheese. Add another layer of pasta and meat. Place the last layer of pasta and cover with tomato sauce. Cover with mozzarella and spoon on a bit more tomato sauce.

Bake:
Bake in the preheated oven for 40- to 45 minutes. Allow to stand, covered with aluminum foil, for 10 minutes before serving.  Spoon some of the remaining tomato sauce on each portion and serve with grated Parmesan on the side for those who wish to add it.